Mulligans Part III: Constructed

All Limited decks share common characteristics. It's true that some are faster, some are slower; some have bomb rares, and some do not. However, Limited decks are predictable in the sense that they virtually all try to win by attacking with creatures, managing the board with removal spells, and accumulating small advantages over the course of the game. This is not the case in Constructed.
Constructed decks can be wildly different. They employ completely different game plans, and can range from blisteringly fast to glacially slow. Cards that are great against one Constructed deck might do virtually nothing against another. Because of this, the issue of mulligans is much more complicated in Constructed than it is in Limited.
The previous Level One articles on mulligans (Part One and Part Two) feature a lot of important concepts that can be applied to Constructed mulligan decisions. Today, however, we'll go into greater depth on the topic, and how both the deck you're playing and the deck your opponent is playing should influence your decisions. At the end, I'll preview a unique new card from Magic Origins that relates to mulligan decisions in very deep ways.
Knowing Your Own Deck
Mulligan decisions in Constructed are all about context—the way your deck matches up against your opponent's. The first step is to understand your own deck. What is your game plan? What tools do you need to achieve it? What are the costs of mulliganing, or of keeping a bad hand?
Key Cards
Sometimes, the presence or absence a particular card can change the value of your hand in an extreme way.
In Modern, the Bogles deck tries to put a bunch of auras—like Rancor and Daybreak Coronet—onto a hexproof creature like Slippery Bogle or Gladecover Scout. In this way, it can beat the opponent down quickly and effectively without ever being vulnerable to creature removal spells.
The Bogles deck plays eight 1-drop hexproof creatures, and badly needs one of them to be in the opening hand. When playing Bogles against an unknown opponent, you should mulligan every seven- and six-card hand that doesn't have a Slippery Bogle or Gladecover Scout.
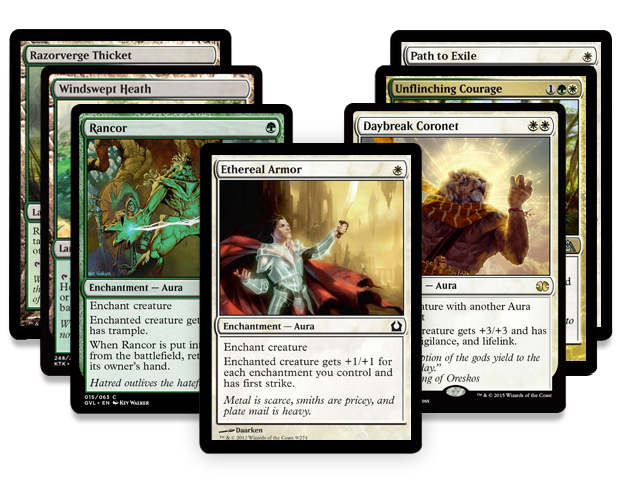
Razorverge Thicket, Windswept Heath, Rancor, Ethereal Armor, Daybreak Coronet, Unflinching Courage, Path to Exile
This hand has a good mix of lands and spells, but is lacking a key card, so you should mulligan.
The other side of the coin is that, when the key card is present, you'll need to loosen your standards a little. You don't want to mulligan a functional hand with a Slippery Bogle only to see a six-card hand that doesn't have one.
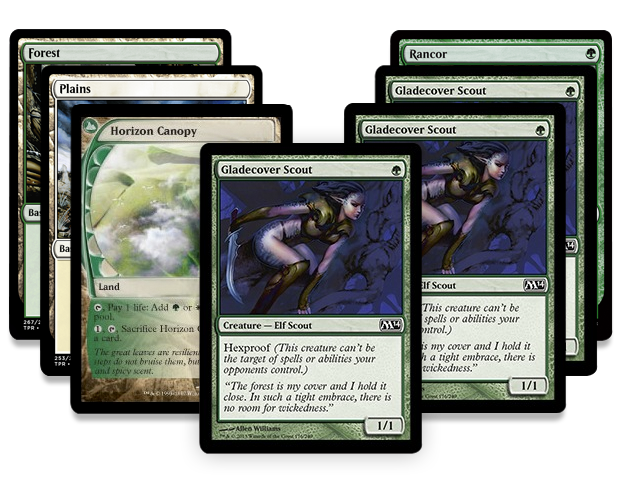
Forest, Plains, Horizon Canopy, Gladecover Scout, Gladecover Scout, Gladecover Scout, Rancor
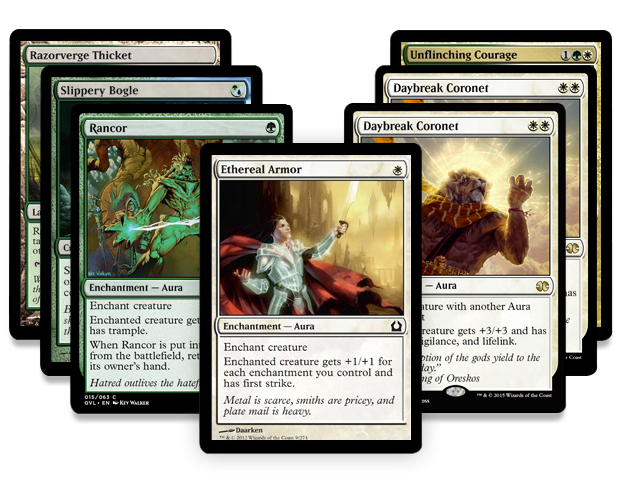
Razorverge Thicket, Slippery Bogle, Rancor, Ethereal Armor, Daybreak Coronet, Daybreak Coronet, Unflinching Courage
Neither of these are perfect hands; each one will probably need a little bit of help from the top of the library to win. However, the presence of the key card makes both of them worth keeping.
Let's look at an example that's similar, but a little less extreme. In Standard, Green Devotion is a ramp deck that looks to generate lots of mana and cast ultra-powerful spells starting around turn four. With Green Devotion, you're really looking for a mana-producing creature like Elvish Mystic or Sylvan Caryatid to give you a jump start. You don't have to "automatically" mulligan a hand without these cards, but their presence or absence is a very important factor. If you get a borderline hand without one, you can feel fairly comfortable throwing it back.
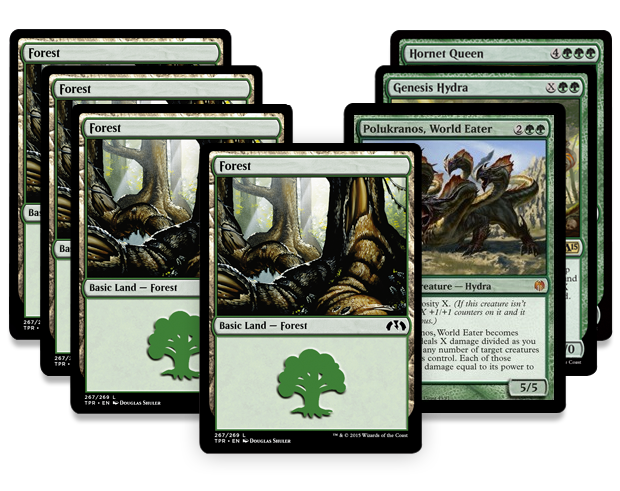
Forest, Forest, Forest, Forest, Polukranos, World Eater, Genesis Hydra, Hornet Queen
Again, you see a hand with a good mix of lands and spells, but it has no mana acceleration and is simply too slow. You should mulligan.
Let's say that you follow my advice, mulligan, and look at:
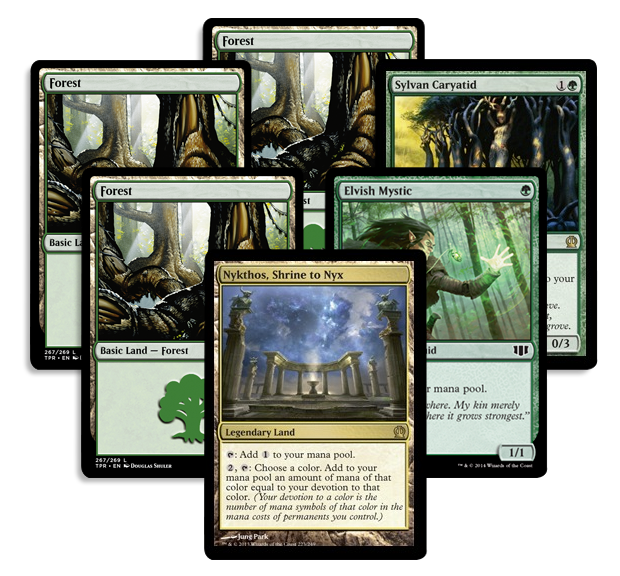
Forest, Forest, Forest, Nykthos, Shrine to Nyx, Elvish Mystic, Sylvan Caryatid
This six-card hand has no heavy-hitter cards. However, everything is in place for you to win the game if you do draw well. If you're fortunate enough to have something like a Whisperwood Elemental on the top of your library, you can cast it on turn three! Because you have your mana acceleration, you should keep this hand rather than mulliganing down to five.
As a side note, we discussed the issue of card quantity last time. Green Devotion, as a deck with a high mana curve, really needs its resources, and will struggle to win when it mulligans down to five cards.
Cheap Cards, Coming Out Fast
What do the key cards of these two decks have in common? They're both cheap! For most decks, the "key cards"—the ones that are most important to have in the opening hand—are going to be the cards that you want to cast in the early turns of the game. Your more expensive cards can come off the top of your library and be cast later, but if you miss out on making your ideal turn-one or turn-two play, you can never rewind the game to that point.
Constructed Magic is fast and unforgiving. Coming out too slowly is an easy way to lose a game. Your mulligan decisions should reflect that. Put a premium on having your best early plays in your opening hand. Mulligan more aggressively if either your deck, or your opponent's deck, is very fast.
There's an important difference between decks that try to win the game quickly and decks that play for longer games. If you want to win the game by turn five, then your opening seven cards must be able to do most of the work. After all, you only get a small handful of draw steps! On the other hand, a deck that's content to drag things out until turn ten or twelve can be patient and wait for the right tools to show themselves. Consider these two hands:
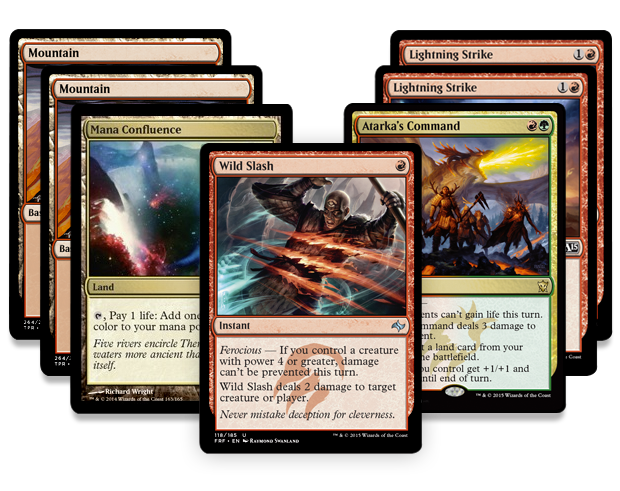
Mountain, Mountain, Mana Confluence, Wild Slash, Atarka's Command, Lightning Strike, Lightning Strike
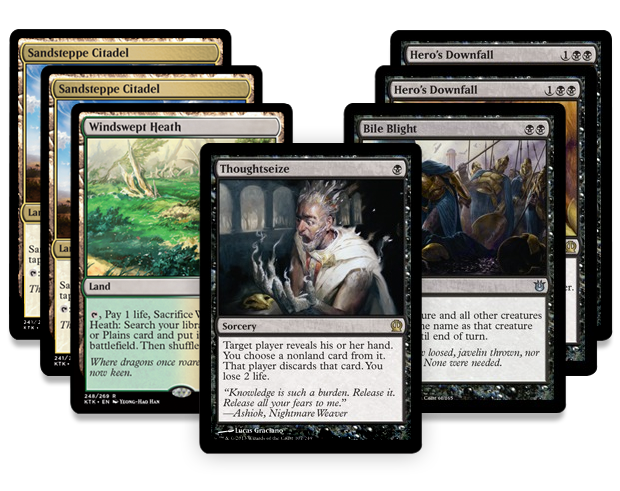
Sandsteppe Citadel, Sandsteppe Citadel, Windswept Heath, Thoughtseize, Bile Blight, Hero's Downfall, Hero's Downfall
Both hands have three lands and four spells, both feature cheap spells, and both are capable of killing the first few creatures the opponent might play. However, one hand should probably be mulliganed, while the other hand is excellent!
With the first hand, you're playing an aggressive mono-red deck. You're seeking to end the game quickly, and your advantage comes from coming out fast and flooding the board with creatures before the opponent can mount a defense. Unfortunately, this hand has no creatures and therefore will struggle to achieve that goal. You desperately want to play a creature (hopefully two or three) in the first three turns of the game, but you don't have many draw steps before you miss that window. To keep this hand would mean not playing to the strengths of your deck.
With the second hand, you're playing Abzan Control, which is a defensive deck that seeks to drag the game out and grind small advantages. In this case, your goal is to survive to the mid and late game, where your powerful spells and two-for-one advantages will allow you to win a topdeck war against your opponent. This hand is perfect for that game plan! You get to dismantle the opponent's initial offense, and the nature of your deck means you can be patient and wait for the top of your library to deliver the rest.
Knowing Your Opponent's Deck
Knowing your opponent's deck is just as important for your mulligan decisions as knowing your own deck. While you'll go into a tournament with a game plan in mind, you might have to subtly (or greatly) adjust that game plan according to the way your deck matches up against your opponent's.
In a tournament setting, you often won't know what deck your opponent is playing until after you make your mulligan decision in Game 1. However, you will always know after sideboarding. Your sideboarding is a very important factor in your mulligan decisions.
Key Cards Against Your Opponent's Deck
Previously, I used the example of Thoughtseize being one of the best cards against Blue-White Heroic. What if you're playing Modern, and you've sideboarded in three copies of Back to Nature against the enchantment-based Bogles deck, or three copies of Ancient Grudge against the artifact-based Affinity deck? You don't necessarily have to mulligan until you find these cards, but you should consider the fact that a decent six-card hand with one of these cards will be much better than a mediocre seven-card hand without them. If you're on the fence, the presence of sideboard cards like these can be a great tiebreaker in favor of mulliganing.
Fast Matchups
You need to be prepared for what your opponent is going to throw at you. It can be fine to keep a slow hand in certain types of matchups, but once you know your opponent is playing Mono-Red Aggro, you should mulligan until you find a hand that won't simply get run over.
Slow Matchups
In other matchups, you can feel confident that the game won't be ended by an early rush. In these matchups, it's good to loosen your standards in order to avoid the disadvantages that come from starting the game down a card.
Imagine you're playing Esper Control and you look at this opening hand:
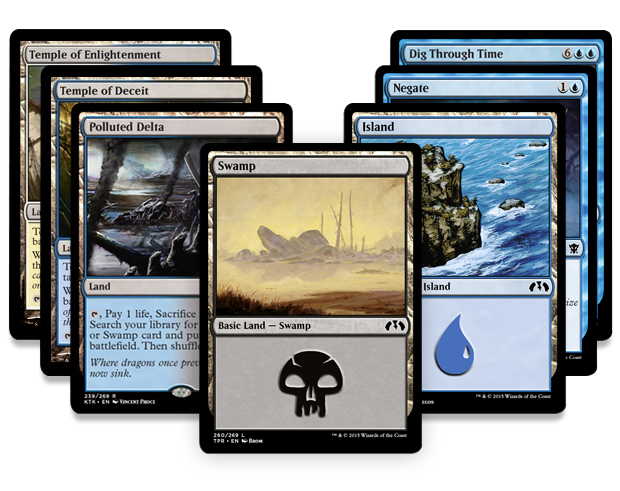
Temple of Enlightenment, Temple of Deceit, Polluted Delta, Swamp, Island, Negate, Dig Through Time
This is a hand that you're thrilled to keep against an opposing control deck like Abzan or Blue-Black Control. However, it's a hand that you should mulligan if you're playing against Mono-Red. Everything depends on context, and the pace of the matchup is one of the most important factors in your mulligan decisions.
Molten Vortex
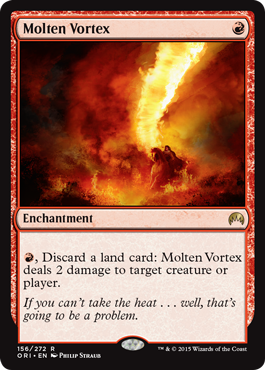
Molten Vortex is the type of card that I'm most excited to preview. It has an effect that's both extremely powerful and extremely unique. Molten Vortex is a game changer.
There are only two cards in Magic's history to which Molten Vorex can be compared: Stormbind and Seismic Assault. Both have been tremendously powerful in their times, and I expect the same to be true of Molten Vortex.
In fact, Vortex probably compares favorably to these two. It's much more affordable, being cheap to cast and half the price of Stormbind to activate. Since Seismic Assault is free to activate, it has more potential in a combination deck that seeks to dump a hand full of lands at a moment's notice. However, I believe that Molten Vortex is the better card when used in any kind of "fair" capacity.
Perhaps "fair" is not the appropriate word for this effect, as there are plenty of ways to use it in an overpowered capacity. One thing that comes to mind is to use Molten Vortex in combination with Life from the Loam in Legacy or Modern.
However, Life from the Loam isn't the only way to put extra lands in your hand. I could also envision it in a Temur-colored Standard deck featuring Satyr Wayfinder and Treasure Cruise. Such a deck would offer you the volume of cards necessary to fuel the Vortex. Moreover, with the engine of Wayfinder and Den Protector, you could dump your Vortex into the graveyard, and pick it up in the late-game once you're ready for it.
All that said, you may not need to do anything special at all to make good use of Molten Vortex. Against a deck of weenie creatures, you only need to shoot down two or three creatures before Molten Vortex has had a huge, worthwhile effect on the game.
Decks with low mana curves that don't otherwise have uses for their extra lands might turn to Molten Vortex. Imagine, for example, that nothing in your deck costs more than 1 or 2 mana, but that the games sometimes go seven or eight turns. In such a case, it wouldn't be uncommon to have an extra three or four lands in your hand that you'd want to discard to Molten Vortex. It offers a tremendous amount of "reach" for a red-based aggro deck.
I felt it was important to preview Molten Vortex in the context of mulligan decisions for two reasons.
First, in any deck that chooses to play with Molten Vortex, it's likely to be a key card. If you've put Vortex in your deck, it's likely that you've sculpted your game plan around it in some way; your deck is probably going to function substantially better when you draw it than when you do not. In such a case, you'll be more inclined to mulligan a hand without Molten Vortex in it.
However, you'll have to strike the right balance with the second factor, which is that Molten Vortex demands a large card quantity. It allows you to make use of your resources that would otherwise be fairly unimportant, but you can't take full advantage of Molten Vortex if you're low on cards in hand. Under these circumstances, going down a card is extra costly.
Mulligan decisions are about weighing pros and cons, risks and rewards. What's the cost of going down a card? What's the risk of keeping a subpar opening hand? In this three-part series, I've been able to offer lots of questions, but few concrete answers. However, improving at mulligan decisions is largely about cultivating your instincts and getting a feel for what works and what does not. Keep working at it, and your efforts will be well placed.