Commander (2016 Edition) Decklists

The full Card Image Gallery is live! Much rejoicing and perusing has been had.
That means we're just two weeks from the release of Commander (2016 Edition), your first opportunity to get your hands on all of the cards in that Card Image Gallery.
But, you might ask, which cards come in which deck? How will I know how to get my hands on Goblin Spymaster, Yidris, Maelstrom Wielder, or Primeval Protector? How?!
That's what this article is for. Below you'll find the decklists for each of the five decks. One note: because the cards have not yet been put into Gatherer, our card database, new cards will not show up as something you can hover over and they will all be grouped under "Other" instead of "Creature" or "Land" or the like. If you're wondering what a card is, I highly recommend opening the Card Image Gallery in a tab and having them side-by-side. Gatherer will update before the set releases.
Now, on to the decklists!
Entropic Uprising
Title: Entropic Uprising
Format: Commander
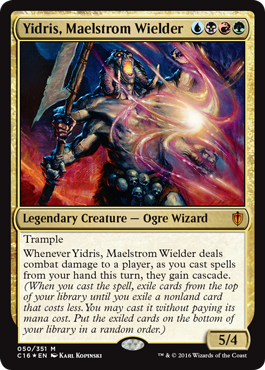
Commander: Yidris, Maelstrom Wielder
1 Satyr Wayfinder
1 Wall of Blossoms
1 Coiling Oracle
1 Thrasios, Triton Hero
1 Goblin Spymaster
1 Spellheart Chimera
1 Vial Smasher the Fierce
1 Academy Elite
1 Gamekeeper
1 Sangromancer
1 Bloodbraid Elf
1 Horizon Chimera
1 Kydele, Chosen of Kruphix
1 Glint-Eye Nephilim
1 Aeon Chronicler
1 Guiltfeeder
1 Consuming Aberration
1 Nath of the Gilt-Leaf
1 Runehorn Hellkite
1 Etherium-Horn Sorcerer
1 Dragon Mage
1 Blood Tyrant
1 Sol Ring
1 Fellwar Stone
1 Rakdos Signet
1 Simic Signet
1 Chromatic Lantern
1 Commander's Sphere
1 Whispersilk Cloak
1 Boompile
1 Burgeoning
1 Waste Not
1 Frenzied Fugue
1 Chain of Vapor
1 Rakdos Charm
1 Chaos Warp
1 Ancient Excavation
1 Evacuation
1 Bituminous Blast
1 Curtains' Call
1 Wheel of Fate
1 Windfall
1 Parting Thoughts
1 Far Wanderings
1 Past in Flames
1 Whispering Madness
1 Decimate
1 Devastation Tide
1 Reforge the Soul
1 Worm Harvest
1 Spelltwine
1 Whims of the Fates
1 Grave Upheaval
1 Cruel Entertainment
1 Ghastly Conscription
1 Volcanic Vision
1 Treasure Cruise
1 Treacherous Terrain
1 Army of the Damned
1 In Garruk's Wake
1 Ash Barrens
1 Command Tower
1 Crumbling Necropolis
1 Dismal Backwater
1 Evolving Wilds
1 Exotic Orchard
1 Frontier Bivouac
1 Jungle Hollow
1 Opulent Palace
1 Rakdos Carnarium
1 Reliquary Tower
1 Rugged Highlands
1 Rupture Spire
1 Savage Lands
1 Shadowblood Ridge
1 Simic Growth Chamber
1 Swiftwater Cliffs
1 Terramorphic Expanse
1 Thornwood Falls
5 Island
5 Swamp
5 Mountain
5 Forest
Open Hostility
Title: Open Hostility
Format: Commander
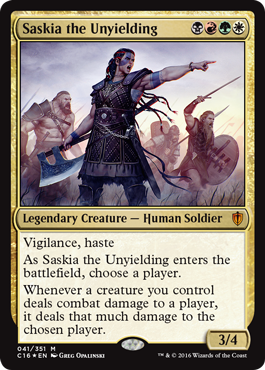
Commander: Saskia the Unyielding
1 Wight of Precinct Six
1 Den Protector
1 Quirion Explorer
1 Sakura-Tribe Elder
1 Sylvok Explorer
1 Korozda Guildmage
1 Zhur-Taa Druid
1 Selesnya Guildmage
1 Mentor of the Meek
1 Mirror Entity
1 Alesha, Who Smiles at Death
1 Taurean Mauler
1 Managorger Hydra
1 Wild Beastmaster
1 Tymna the Weaver
1 Wilderness Elemental
1 Dauntless Escort
1 Brutal Hordechief
1 Charging Cinderhorn
1 Thelonite Hermit
1 Tana, the Bloodsower
1 Iroas, God of Victory
1 Mycoloth
1 Ravos, Soultender
1 Ankle Shanker
1 Thunderfoot Baloth
1 Stalking Vengeance
1 Stonehoof Chieftain
1 Primeval Protector
1 Skullclamp
1 Sol Ring
1 Conqueror's Flail
1 Fellwar Stone
1 Gruul Signet
1 Lightning Greaves
1 Commander's Sphere
1 Sunforger
1 Blind Obedience
1 Evolutionary Escalation
1 Necrogenesis
1 Beastmaster Ascension
1 Everlasting Torment
1 Frenzied Fugue
1 Breath of Fury
1 Terminate
1 Artifact Mutation
1 Boros Charm
1 Aura Mutation
1 Abzan Charm
1 Naya Charm
1 Crackling Doom
1 Grab the Reins
1 Utter End
1 Sylvan Reclamation
1 Divergent Transformations
1 Order // Chaos
1 Farseek
1 Rampant Growth
1 Shamanic Revelation
1 Grave Upheaval
1 Treacherous Terrain
1 Clan Defiance
1 Lavalanche
1 Ash Barrens
1 Caves of Koilos
1 Command Tower
1 Dragonskull Summit
1 Evolving Wilds
1 Exotic Orchard
1 Grand Coliseum
1 Gruul Turf
1 Jungle Shrine
1 Karplusan Forest
1 Mosswort Bridge
1 Nomad Outpost
1 Orzhov Basilica
1 Rootbound Crag
1 Sandsteppe Citadel
1 Savage Lands
1 Spinerock Knoll
1 Sunpetal Grove
1 Terramorphic Expanse
1 Windbrisk Heights
3 Plains
3 Swamp
5 Mountain
5 Forest
Stalwart Unity
Title: Stalwart Unity
Format: Commander
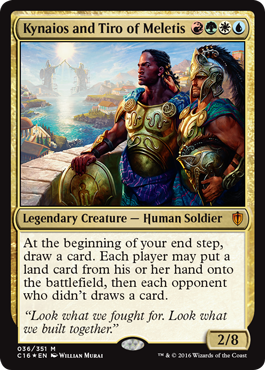
Commander: Kynaios and Tiro of Meletis
1 Veteran Explorer
1 Humble Defector
1 Hushwing Gryff
1 Orzhov Advokist
1 Chasm Skulker
1 Gwafa Hazid, Profiteer
1 Ludevic, Necro-Alchemist
1 Selvala, Explorer Returned
1 Edric, Spymaster of Trest
1 Akroan Horse
1 Selfless Squire
1 Windborn Muse
1 Sidar Kondo of Jamuraa
1 Horizon Chimera
1 Zedruu the Greathearted
1 Psychosis Crawler
1 Kazuul, Tyrant of the Cliffs
1 Kraum, Ludevic's Opus
1 Realm Seekers
1 Rubblehulk
1 Progenitor Mimic
1 Blazing Archon
1 Sol Ring
1 Empyrial Plate
1 Howling Mine
1 Commander's Sphere
1 Temple Bell
1 Assault Suit
1 Prismatic Geoscope
1 Venser's Journal
1 Keening Stone
1 Evolutionary Escalation
1 Oath of Druids
1 Ghostly Prison
1 Propaganda
1 Rites of Flourishing
1 Sphere of Safety
1 Lurking Predators
1 Swords to Plowshares
1 Swan Song
1 Arcane Denial
1 Benefactor's Draught
1 Oblation
1 Beast Within
1 Entrapment Maneuver
1 Reins of Power
1 Sylvan Reclamation
1 Minds Aglow
1 Collective Voyage
1 Hoofprints of the Stag
1 Cultivate
1 Kodama's Reach
1 Tempt with Discovery
1 Wave of Reckoning
1 Migratory Route
1 Seeds of Renewal
1 Reverse the Sands
1 Treacherous Terrain
1 Blasphemous Act
1 Ash Barrens
1 Azorius Chancery
1 Command Tower
1 Evolving Wilds
1 Exotic Orchard
1 Forbidden Orchard
1 Frontier Bivouac
1 Gruul Turf
1 Homeward Path
1 Izzet Boilerworks
1 Jungle Shrine
1 Krosan Verge
1 Myriad Landscape
1 Mystic Monastery
1 Opal Palace
1 Rupture Spire
1 Seaside Citadel
1 Selesnya Sanctuary
1 Terramorphic Expanse
1 Transguild Promenade
5 Plains
5 Island
5 Mountain
5 Forest
Breed Lethality
Title: Breed Lethality
Format: Commander
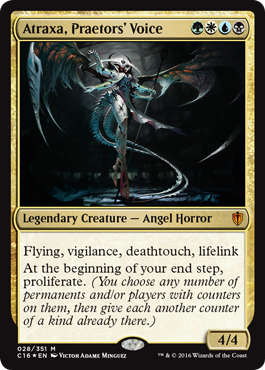
Commander: Atraxa, Praetors' Voice
1 Thrummingbird
1 Festercreep
1 Scavenging Ooze
1 Abzan Falconer
1 Orzhov Advokist
1 Tuskguard Captain
1 Necroplasm
1 Champion of Lambholt
1 Reyhan, Last of the Abzan
1 Vorel of the Hull Clade
1 Crystalline Crawler
1 Custodi Soulbinders
1 Forgotten Ancient
1 Bane of the Living
1 Ishai, Ojutai Dragonspeaker
1 Corpsejack Menace
1 Fathom Mage
1 Master Biomancer
1 Elite Scaleguard
1 Reveillark
1 Deepglow Skate
1 Kalonian Hydra
1 Ikra Shidiqi, the Usurper
1 Vulturous Zombie
1 Juniper Order Ranger
1 Ghave, Guru of Spores
1 Enduring Scalelord
1 Sol Ring
1 Fellwar Stone
1 Golgari Signet
1 Orzhov Signet
1 Simic Signet
1 Commander's Sphere
1 Darksteel Ingot
1 Cauldron of Souls
1 Astral Cornucopia
1 Hardened Scales
1 Brave the Sands
1 Duelist's Heritage
1 Bred for the Hunt
1 Citadel Siege
1 Cathars' Crusade
1 Disdainful Stroke
1 Solidarity of Heroes
1 Grip of Phyresis
1 Inspiring Call
1 Mortify
1 Putrefy
1 Ancient Excavation
1 Mirrorweave
1 Sylvan Reclamation
1 Manifold Insights
1 Languish
1 Tezzeret's Gambit
1 Migratory Route
1 Merciless Eviction
1 Spitting Image
1 Sublime Exhalation
1 Duneblast
1 Treasure Cruise
1 Arcane Sanctum
1 Ash Barrens
1 Azorius Chancery
1 Command Tower
1 Darkwater Catacombs
1 Dreadship Reef
1 Evolving Wilds
1 Exotic Orchard
1 Golgari Rot Farm
1 Murmuring Bosk
1 Opal Palace
1 Opulent Palace
1 Sandsteppe Citadel
1 Seaside Citadel
1 Sungrass Prairie
1 Temple of the False God
1 Terramorphic Expanse
1 Underground River
5 Plains
4 Island
5 Swamp
7 Forest
Invent Superiority
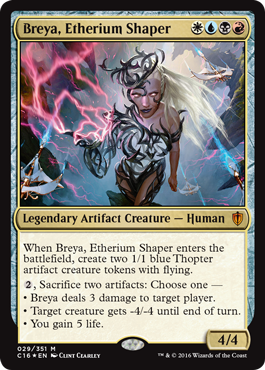
Title: Invent Superiority
Format: Commander
Commander: Breya, Etherium Shaper
1 Myr Retriever
1 Chief Engineer
1 Etherium Sculptor
1 Vedalken Engineer
1 Slobad, Goblin Tinkerer
1 Baleful Strix
1 Akiri, Line-Slinger
1 Armory Automaton
1 Shimmer Myr
1 Master of Etherium
1 Trinket Mage
1 Magus of the Will
1 Hanna, Ship's Navigator
1 Silas Renn, Seeker Adept
1 Sydri, Galvanic Genius
1 Etched Oracle
1 Solemn Simulacrum
1 Sanctum Gargoyle
1 Faerie Artisans
1 Bruse Tarl, Boorish Herder
1 Ethersworn Adjudicator
1 Sphinx Summoner
1 Jor Kadeen, the Prevailer
1 Soul of New Phyrexia
1 Godo, Bandit Warlord
1 Hellkite Tyrant
1 Sharuum the Hegemon
1 Myr Battlesphere
1 Hellkite Igniter
1 Filigree Angel
1 Everflowing Chalice
1 Skullclamp
1 Sol Ring
1 Dispeller's Capsule
1 Executioner's Capsule
1 Cranial Plating
1 Fellwar Stone
1 Ichor Wellspring
1 Mycosynth Wellspring
1 Swiftfoot Boots
1 Thopter Foundry
1 Commander's Sphere
1 Loxodon Warhammer
1 Bonehoard
1 Nevinyrral's Disk
1 Trading Post
1 Blinkmoth Urn
1 Daretti, Scrap Savant
1 Curse of Vengeance
1 Grip of Phyresis
1 Ancient Excavation
1 Read the Runes
1 Trial // Error
1 Whipflare
1 Parting Thoughts
1 Trash for Treasure
1 Beacon of Unrest
1 Migratory Route
1 Open the Vaults
1 Phyrexian Rebirth
1 Grave Upheaval
1 Coastal Breach
1 Arcane Sanctum
1 Ash Barrens
1 Azorius Chancery
1 Boros Garrison
1 Buried Ruin
1 Command Tower
1 Crumbling Necropolis
1 Darksteel Citadel
1 Dimir Aqueduct
1 Evolving Wilds
1 Exotic Orchard
1 Mystic Monastery
1 Nomad Outpost
1 Rakdos Carnarium
1 Rupture Spire
1 Seat of the Synod
1 Temple of the False God
1 Terramorphic Expanse
1 Transguild Promenade
5 Plains
5 Island
4 Swamp
4 Mountain