Nuts & Bolts #5: Initial Playtesting
Four years ago, I started a little series called Nuts & Bolts. The idea was that I would give a behind-the-scenes look at the technical side of making a design. My first article was about card codes, the means R&D uses to keep track of all the cards in a file. That was followed up by an article talking about design skeletons, the tool a Magic designer uses to plan out the structure of his or her set. The year after that, I talked about filling in your design skeleton, starting with the commons. Last year, I talked about how to fill in the all the other rarities. Today, I am going to go to the next step. And as Gatecrash is fresh on everyone's minds, I thought I would use the set as my example today in what the next step is. (I'm also trying hard to make this article relevant for those who aren't eager to design their own Magic sets.)
Come Together
When last we left, you made a design skeleton and then filled it all in. You now have a card for every slot. We're done, right? No. Quite the opposite, actually. We're just beginning. The reason you want to have a card for every slot is that it allows you to advance to the next part of design—playtesting. Design is what is known as an iterative process, where you walk through the same steps, each time making incremental changes. In card design, that iterative process is as follows:
- Make cards.
- Playtest those cards.
- Take notes from the playtest.
- Change cards based on those notes, sometimes making new cards altogether.
- Go back to step 2.
The reason a design skeleton is so important is that you need to give your card file some structure so you start your playtest with some cohesion. Your set is about something. Maybe not the something it will ultimately be, but something that is important. You can easily change one thing into another but it's hard to change nothing into something.
I should also point out that, in R&D, we tend to start the iterative process as soon as we're through with the commons. We start there because an all-common playtest is enough to get a sense of if you're going in the right direction. The filling in of the design skeleton and the iterative playtest process then continue concurrently. I had you fill in the rest of the design skeleton first, as it's hard in a series like Nuts & Bolts to have you work concurrently. Also, doing a first pass on your whole design skeleton helps you get a sense of where you want to go with the whole set.
We'll start today by having you take all your commons and have a playtest. In early design, I recommend a smaller playtest, as it's going to be rough and you don't want to sour people for later in the set's life. In R&D, I tend to restrict early design playtests to just the design team. So, as you're playing, watch for the following:
- What's fun? This is the most important. You haven't crafted an environment yet; you've just made some cards. The first all-common playtests are to kick the tires and see what shows potential. Note the cards that make you smile.
- What's not fun? This is equally important. If a card or cards are actively unfun, jot that down as well. Remember that at this stage, nothing is set in stone. Any card or mechanic or theme can be ripped out.
- Are cards living up to your expectations? One of the most valuable things about playtests are that they force you not to think about the cards but play with them. Often, things that sound interesting aren't. Once you get to play with your cards, you'll see that sometimes there isn't much decision, the thing that is supposed to matter seldom matters, or the card just doesn't work.
- Is anything confusing? Another common problem is that things that sound easy get much more complicated when you actually try to use them. There are all sorts of issues that might not come up when you're thinking about the card but are instantly in your face when you play it. Note that in an all-common playtest, a frequent note is "move this card to uncommon (or higher)." I joke that many of the cards designed for common aren't common. This is true in professional Magic design, so I know it's also true for most of you.
- Are your themes coming through? One of my design dictums is "If your theme is not at common, it's not your theme." In an all-common playtest, you should be able to get a feel of what your set is about. If you can't feel it at all, that's the biggest issue. Often, it will have some feel, but not exactly what you anticipated. That's not necessarily bad if you like what you get.
To help you today, I'm going to walk you through what happened when I ran my first few all-common Gatecrash playtests. To get you up to speed, here's where the Gatecrash mechanics were at the time:
- Orzhov: We were playing with a mechanic that went on creatures that triggered when they died. Unfortunately, I don't remember what it was called.
- Dimir: We were using grind, the "mill until you hit a set number of lands" mechanic. Grind is still in the set, but it isn't keyworded.
- Gruul: We were using a mechanic called rowdy, where the creature got to fight with a creature controlled by a player when it dealt combat damage to that player.
- Boros: We were using battalion as it is now.
- Simic: We were using evolve, although the version that just triggered off of power.
The first handful of playtests (to speed this story along I'm condensing numerous playtest into one session) showed a number of things. Evolve and battalion were both very fun. Grind was fun for the players who dedicated themselves to milling but was frustrating for the players who just dabbled in it. Rowdy was crazy powerful. And the Orzhov mechanic was a bust. It was confusing and it didn't hang together well.
The Bigger Picture
Since this is a Nuts & Bolts article, let me take a step back and walk you through what we just did from a more bird's eye view. When putting together a set, the first thing you have to do is figure out what is the mechanical heart of the set. I've been talking about this concept during my "Designing for" series, but I'll explain again here.
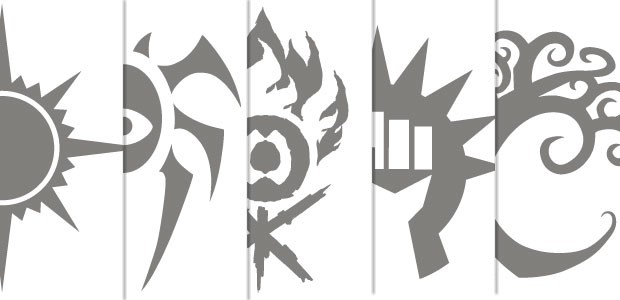
The mechanical heart of a set is the mechanical element that lies at the heart of your design. Essentially, you have to prioritize something that you then build around. The reason the priority is so important is because, when you have conflicts, you need to have something that dictates priority. For Gatecrash, the mechanical heart was given to us—the guilds. In Gatecrash's case, specifically the five guilds assigned to us (Orzhov, Dimir, Gruul, Boros, and Simic). That meant that the first playtests were about figuring what the guilds did. That wasn't just the guild mechanic; I was looking for the feel of the guild.
Remember that you always want to start with the most important thing that's the hardest to design, so you increase the tools available to design it. In Gatecrash, the guilds came first and their guild mechanics took up the most space, so that's where we started.
After the initial playtests, I asked myself the following question: Have I found the guild mechanic for each guild? For Simic and Boros, the answer was yes. For Dimir, the answer was maybe, but there was work to be done to make it fit. For Gruul, I was skeptical, but I needed to do my due diligence with development. For Orzhov, the answer was no.
For Simic and Boros, I had to move onto the next stage, which was to look beyond the guild mechanic to the rest of the commons. What could I do that filled in my set skeleton but also created synergy with the guild mechanic? As an example, I needed a vanilla creature in green common (this didn't last all the way through the set's design and development). Knowing that evolve was my mechanic, I was motivated to make either the power or toughness higher. (Figuring out to include toughness as well as power happened early in design.) Normally, a 4/1 or a 1/5 might not be an attractive green common creature, but in a set with evolve, it was very interesting. The key was to look at my requirements in the set skeleton and see if I could meet them while also being synergistic with my guild mechanic.
For Dimir, I had to figure out how to make milling relevant in decks that didn't mill a lot. The trick here was to look at the set skeleton and see if I could make cards that fit needs I had while also caring about my opponent having been milled. While my objective was different, I was doing the same thing with Dimir as I was doing with Simic and Boros. I was using the restrictions of the set skeleton to help me get creative in solving the guild's issue. In the end, we added some cards to the set that cared about cards being in the graveyard. This would allow a Dimir deck with just a few milling cards to get some utility out of milling a little.
For Gruul, I started by talking with the developer on the design team, Dave Humpherys (Dave was also the lead developer for the set). I had him talk with the other developers to see how dangerous they felt the rowdy mechanic was. Dave helped me adjust the costs to make the mechanic more balanced. After a few playtests, we ended up changing from rowdy to kickboxing, a mechanic that tried a different approach with fighting (as a kicker-like additional cost that made the creature fight when it entered the battlefield). Note that while trying to fix Gruul, I mostly focused on mana costs and tweaks relevant to making the mechanic work. I spent very little time messing with other cards because until I could prove that the mechanic worked, it wasn't worth wasting time on making supporting cards.
For Orzhov, we had to start over. As with Gruul, my focus was just on the cards with the mechanics. We tried something new, a mechanic called oppress, designed by Mark Gottlieb. Oppress permanently added the following text to a nonland permanent: "The next time this permanent is the target of a spell, sacrifice it." This ability was targeted to allow one oppress effect to destroy a permanent previously oppressed.
This, of course, begs the question, what was filling in the non-mechanic slots for the initial playtests? The answer is basic cards. Until you have a good handle on what your set is doing, basic cards serve well both to allow you to play and to let the new parts of the set take focus.
You'll notice that different parts of the set were changing in different ways. That's fine. Set design is an ever-changing process, as there's no reason that all the parts have to advance at the same rate. Also, by cementing certain things in place, you start to define your overall environment, which starts forcing restrictions on your remaining mechanics. Remember, restrictions are your friend, so this limiting of options often can help you better frame what the remaining mechanics need to do.
As an example, we spent a lot of time trying to figure out what Orzhov was going to do. As we started nailing down mechanics, we realized we were leaning toward mechanics that cared about creatures and combat. That pushed us to find an Orzhov mechanic that cared more about casting spells.
The Glue
Stage one is figuring out your mechanical heart. Stage two is finding the support cards that work with your mechanical heart. Stage three is what I call the glue stage. Let's look back at Gatecrash.
We fiddled around with different mechanics until we found one we liked for each guild. Once we had the guild keywords, we then tried to fill in the set skeleton with cards that were synergistic with what our guilds were doing. Now we come to the next step. The next batch of cards are ones that are synergistic with two different guilds. The easiest place to look at for this was the monocolor cards.
Let's take mono-white as an example. White cards would be played with either Boros or Orzhov. I wanted about half of the white cards to be good with one or the other guild. I split these in half, which meant that I made sure about 25% of the mono-white commons played nicely with Boros and 25% played nicely with Orzhov. Then, for the remaining 50%, I started looking for cards that played well with both guilds. Note that these percentages are a guideline and will ebb and flow as the design continues.
Why is it important to have some of the cards only work with one guild? Why not have every monocolored card overlap both guilds? Well, (a) it would be impossible to do and (b) it's important, especially for Draft, to have some cards that get to the person who needs them. By having the cards be more narrow, it helps ensure they're not picked off earlier by other players.
Before I move on, I should stress I'm simplifying things a little for the sake of walking you through the process. For each guild, for example, we built a primary and a secondary route to victory. This would allow players who liked a particular guild to have more variety in replays because the guild wouldn't always be doing the exact same thing. This does mean that the synergies were further broken down to match each guild strategy, but that's a little complex, so I'm just going to talk about a single synergy with each guild.
Let me stress a few things that might not be obvious about this plan. First, watermarked cards (i.e., cards closely aligned with the guild) were allowed to count in the 50%. What I mean is that just because a card uses a guild mechanic, for instance, doesn't mean it might not be useful in another guild's deck. Second, some cards are general utility and won't fit particularly into any guild's strategy. For example, white is going to need a common enchantment-removal card. Most likely that will have nothing to do directly with Boros or Orzhov, but each deck might need the card in certain circumstances. These cards mess a little with the 25/25/50 breakdown I talked about earlier.
Designing the mechanical heart correctly is crucial. Making the right support cards is also vital. But the key to making a set truly shine is creating the right glue cards. If done correctly, the glue cards won't necessarily need to be that blatant. Some of the best glue cards are ones that aren't obvious about their intentions. They might seem to lead toward one part of your design, but as players play with the set, they'll start to see other uses for them. It's these moments of players making discoveries that cause some of the strongest emotional bonding to the game.
The Quirks of an All-Common Playtest
The reason I suggest starting with an all-common playtest is to ensure that your set is communicating its basic message at the core of the design. Remember that more than two-thirds of all the cards the players will see in Limited will be the commons. Common cards are the hardest to design, so I want to make sure you all put your time and energy first in making your commons sing. That said, there are a few quirks of an all-common playtest I want to point out:
#1: It's Harder to Come Back
There are things in Magic that we keep out of common. For example, we tend to avoid making common cards that can kill multiple creatures, especially permanents that either do it repeatedly or two-for-one the opponent by destroying something while also providing you with a resource (the most basic example is a creature with an "enters the battlefield" destruction/damage effect). These kinds of cards are what help players turn the game around. This means that all-common playtests don't have much of a catch-up feature. If one player gets ahead, there is little the other player can do.
#2: There're More Stalemates
We also tend to scale creature size based on rarity. For example, only green and blue tend to have a creature 5/5 or greater at common. This smaller overall size makes for less gradation between creatures, making all creatures a lot closer in size. This leads to more stalemates because it's a lot easier for creatures on both sides to be roughly the same size.
#3: The Game Play is More Generic
Another thing we scale by rarity is the quirkiness of the effect. Commons do more basic, straightforward things, while higher rarities tend to get to play more among the edges. This will make the game play more similar from game to game and will keep all games closer to the norm of a default game of Magic.
#4: There's More Repetition
Common playtests (especially small sets) just don't have as many cards as a full set will have. This means you'll see the same cards more often. One of the rules I always use is what I call the "Take Two" rule. The Take Two rule says that you should not play more than two of the same card (unless there's some element of the set that is trying to get you to strategically play more—think the ripple mechanic from Coldsnap). If you get more than two copies of a card, I let players trade back cards for random cards of the same color.
The biggest lesson, though, is this: An all-common playtest is not about the environment. Not yet. The initial playtests are about getting a feel of the individual cards and mechanics. As you iterate and start molding the common cards, the environment will start to form, but that should not be your focus in early playtesting. Your initial job is figuring out what pieces are working.
Another tip I'll give for the early playtests is this: Make sure your playtesters don't just play to win. The environment isn't balanced yet. The goal in the early playtests is to experience and to learn. To do that, you have to play with all the cards, which means you have to actively track down things you haven't tried before. A common trick I'll do is to either assign colors to playtesters to ensure every color gets played or require the playtesters not play with the color combinations they played with before. Also, encourage your playtesters to experiment.
Final Notes
Before I wrap up for today, a few final things I'd like to point out:
- Early playtesting is not as fun as normal Magic: There is a great thrill to trying out things for the first time, but make sure your playtesters don't judge the fun of the playtest against normal Magic. As I pointed out above, the all-common playtests leaves out a lot of things that make actual Magic fun.
- Take notes: There's a lot going on and it's crucial that you capture as much data as you can. I always have a notepad so playtesters can yell out comments as they happen. Seriously, it is crucial you write your notes down as they happen. Also, R&D always follows up playtests by having each player write up a short description of his or her playtest experience.
- Push for more design comments than development comments: If a card is overcosted, that's fine to jot down, but the key to the early playtests is figuring out the design elements. Whether something is fun to play is far more important than how it will play in Standard. Yes, at some point, you will need that information, but these playtests are just too early for it.
- Iterate, iterate, iterate: See my list up above. After a playtest or two, take notes and figure out what you can improve. Then improve it before you play again.
- Also, playtest, playtest, playtest: Another common danger is designers talking endlessly about a card file rather than sitting down and playing it. Nothing is going to help you better figure out what needs to get done than playing with the cards. You aren't designing a car without driving it, and you aren't going to make a card set without playing it.
Aw Nuts (and Bolts)
That's all I have for you today. I hope you enjoyed my yearly jaunt through Design 101. As always, I am eager to get feedback on today's column through my email, this column's thread, or any of my social media (Twitter and Tumblr).
Join me next week when I explain how to improve upon nature.
Until then, may you have a playtest where your notebook fills up.

