Nuts & Bolts #6: Iteration
Once a year, I write a Nuts & Bolts article. This series is aimed at players who are interested in making their own custom sets. This is the sixth article in the series. To keep it interesting for everyone else, I also use it to show how we make sets so you can get a behind-the-scenes look at how design happens at a very granular level. Before I begin, let me recap the last five Nuts & Bolts articles:
Nuts & Bolts #1: Card Codes: The very first article was all about the card codes we use to track the cards in a card file. It's minutiae but important to the task at hand.
Nuts & Bolts #2: Design Skeleton: The second article then explained how to use these card codes to create a device we call a design skeleton, a tool designers use to put their sets together.
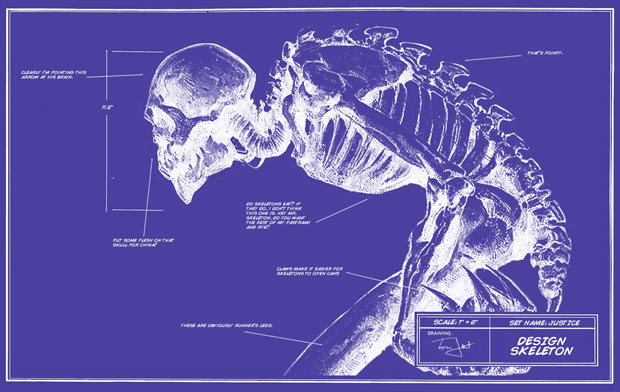
Nuts & Bolts #3: Filling In the Design Skeleton: The third article explained how once you have your design skeleton what you need to do to start filling it in. This article only talks about how to fill in the commons.
Nuts & Bolts #4: Higher Rarities: The fourth article helped you fill out the rest of the rarities in your design skeleton.
Nuts & Bolts #5: Initial Playtesting: The fifth article explained that once you had your design skeleton filled in with commons (I had you fill in the whole design skeleton because it was easier doing it consecutively, but normally you start with commons), it was time to start playtesting. This article talks about what to expect from an all-common playtest and how to extract the information you need from it.
Which brings us to today. You have your common design skeleton filled in. You've done a few playtests. So, what's next?
Iterational Geographic
Last Nuts & Bolts, I brought up the concept of iteration. This article, I am going to dig deeper into what exactly iteration is and how you are going to use it to advance your card file to the next level.
Runic Repetition | Art by Svetlin Velinov
So let's begin with the most basic question—what is iteration? Iteration is doing something again and again using feedback from previous times to improve the process. Now, I've talked numerous times about Malcom Gladwell's "10,000 Hour Rule." It comes from his book Outliers, where he was trying to figure out what separated the truly gifted from the average person. Why is someone a concert pianist while someone else can just play half a song?
Was it genetics? Was it training? Was it luck? What exactly was the common factors between the masters of a wide variety of different skills? The answer was time and dedication. The people who got really good at something did so by doing it again and again—10,000 hours of again and again. But many people miss one of the most important parts of the "10,000 Hour Rule." It's not just 10,000 hours. It's 10,000 hours with constant feedback. That last part is crucial.
It's not enough to just do something again and again. You have to use the doing to learn. The key to getting better is to do something and then get feedback as to whether or not what you're doing is working. Then you have to take that feedback and apply it starting the process all over again. This concept is iteration.
Iteration is at the center of good card design. You start by putting together a design skeleton. Then you playtest it, taking notes from your playtesters, including yourself. You take those notes and you apply them to the card file, making changes. You (or you and your team, if you are lucky enough to have a design team) then change your card file to adapt to the feedback. Next, you playtest again. This cycle continues for the rest of design. Now, there are different parts of design, which I will get to in a moment, but this basic pattern of playtest, fiddle, playtest, fiddle is the heart of how we do Magic design.
Focus, People
The easiest way to think of the parts of design is to think of it as a focus that expands as the set evolves. Here, in order, is the focus:
The Individual Cards
When you first begin design you are looking at every card in a vacuum. It is not about how the cards play together but whether or not each card is working. Now, obviously, cards exist in relation to one another, so each card will interact with other cards. My point is, when you start, your focus is on the individual cards.
Extraplanar Lens | Art by Lars Grant-West
For example, when you first starting playtesting you will have a mechanic or two or three (by the way—be careful not to have too many mechanics early on, part of focusing is not having to think about too many different things). Your early playtest is not about "Did the mechanic as a whole work?" but rather "Did individual cards with the mechanic work?"
Let me explain why this is important. Let's assume you made fifteen cards with a new mechanic. Fourteen of the cards play horribly but one plays wonderfully. Was that a good or bad playtest? That was a great playtest. Why? Two reasons:
One, any time you get strong data one way or another, you are getting feedback that can be easily applied. See those fourteen cards that sucked? Don't do the new mechanic that way. See the one that worked? Do more like that.
Two, the goal when you try a new mechanic is seeing if it works. It doesn't need to work on the majority of the cards, but it does need to work on some of the cards—even one. Now, it's possible that the design space that works ends up being too small, but by following what is working, you will be able to figure that out.
The key here is that looking at data that says fourteen failures and one success makes the mechanic seem like a failure. But looking card by card, you get to see a card with the new mechanic that shines. Early in playtests, that's all you need. The initial playtesting is about learning potential. There are many ways to do something wrong. There are a lot fewer ways to do it right. Playtesting is about discovering the right way to do it.
That is why you have to start focused on the cards. Don't worry about anything bigger than "Is this card working?" A great technique for a first-time designer is to have a list of every card in your set (this is another reason to start with just commons). At the end of the playtest, for each card, jot down whether or not it was fun to play. Write down either "Yes," "No," "Unsure," or "Didn't Play." During the next playtest (you usually want to playtest a few times with each iteration), make sure to play as many of the "Unsure" and "Didn't Play" cards as you can so you can upgrade them to "Yes" and "No." Also, it's fine to have everyone in the playtest do this.
A quick aside to repeat a point I made in last year's Nuts & Bolts article. Playtesting is not playing. You are not there to win. You are there to experience the cards in your set. This means, in different playtests, play different colors. Put cards in your deck that you want to play with even if you think they may not be that good. Unless there is a need to see cards in volume, try playing with as many different cards as you can. The goal in early playtests is to play with as many of the different cards as you can. Be aware, this doesn't mean building your deck so it can't win. You still need the basics so you can experience an actual game, just lean toward choices that show you things you don't already know.
Once you are done playtesting, you will hopefully have a file of cards with "Yes" and "No" next to them. Ideally, you will have multiple responses for each card. If a card is all or mostly labeled "Yes," it stays. If the card is labeled "No," try to figure out what went wrong. Then fix it. It's okay to leave some "No" cards alone. If your gut tells you they have potential, it's okay to give things more playtesting. You just have to realize that if the card keeps getting labeled "No," at some point you will have to cut it.
Two-Card Interactions
Once you have a bunch of individual cards that are working, the next stage is to start examining how they work together. This time, create a sheet where you list every card and write "Combo" and "Bombo." Whenever you find two cards that work well together, write each card on the other's "Combo" list. If the two do not work together put it on the other's "Bombo" list. Note that many cards will be neutral with one another. For those, don't write anything. Keep playtesting until you fill up your sheet.
Ratchet Bomb | Art by Austin Hsu
What exactly do I mean by working together? It means that the two cards are stronger when used together than when used apart. It means that you are happy to draw the second card when you already have the first. It means that there is some synergy that makes the two cards work well together. That synergy doesn't need to be super powerful. It just needs to play nicely together.
If a card gets enough bombos, kill it. It's possible that the card is awesome and scored highly when you were rating each card in a vacuum. That's great. Think fondly of it as you remove it from the file. As I like to say from my screenwriting days, "No movie is worth a scene, no scene is worth a line." If the card is not advancing the greater game it needs to be culled. Be aware, I am not advocating removing cards that are neutral, but rather cards that are actively not working well with the majority of other cards.
These playtests are about starting to get a sense of what in your set is working well with other things in your set. If two mechanics in your set keep showing up in the other's "Bombo" list, that is a sign that one of them might need to go.
The reason you just focus on two-card interactions at this point is that you want your set to start telling you where it wants to go. A common mistake is to force your set in the direction that you want rather than in the direction that the playtesting is telling you. Remember that the feedback you require needs to come from the game play and not from your own thoughts. A big mistake I see with novice designers is that they assume they know more than the game does. If you're right, the game play will bear you out. If it doesn't, guess what? You're most likely wrong.
Mechanical Themes
Now that you are beginning to have cards work together, it's time to start examining your larger mechanical themes. For this series of playtests, I recommend writing down every mechanical theme in your set. This will include all keywords, cycles, mechanical text that appears on multiple cards (i.e., keywords that aren't keyworded), or recurring mechanical motifs (often these are linear themes—for example, ______ matters). Then, during playtesting, have each player keep track of how many cards he or she has from each grouping.
Sydri, Galvanic Genius | Art by Terese Nielsen
The key to these playtests is to pay attention to how each subsection of cards is working. Are your mechanics doing what you intended? Which cards are being played and which ones are not? Are the mechanics you're focusing on driving deck-building choices? Do the mechanics evoke the emotion you intended? Are you missing something that would make the mechanic work better?
During this cycle of the iteration, you are trying to get a sense of whether your main mechanical themes are working. Part of this is figuring out whether they are doing what you intended and part of it is figuring out whether the cards are working together to reinforce the theme. One way to help highlight mechanical themes is to build preconstructed decks with your main themes. This allows you to have playtests that are very focused on the questions at hand.
Once you have your data, you will then be able to figure out what elements are missing. Often, you will design new cards to fill in the gaps you discover or remove cards that aren't advancing the agenda of the theme.
Also, this is the point where you have to start making sure your themes are spread across all your colors. A set will have many themes, but all themes do not normally fall evenly into all colors. You need to focus your mechanical themes in different color combinations to make sure that the set will have a different feel based on what colors get played.
To do this, you will have to make choices as to which colors are best at which abilities. Remember that in order to create focus, you have to make choices. Every color doing everything the same keeps a set from having a strong identity and makes the game play repetitive. Make sure to put at common the themes you want identified with that color. Also, you will begin to start thinking about what each color combination brings to the game play. More on this in a second.
Theme Interaction
The next set of playtests are about looking at how the mechanical components interact. In many ways, the fourth iteration is to the third what the second was to the first. You start by looking at an isolated section and then you start mixing and matching those isolated sections together to see how they interact. Just as with the second iteration, it's fine to take notes about how different sections work with one another.
Triskelion | Art by Christopher Moeller
For this iteration, you want to pay attention to how your themes work together. If they don't, you will have to start tweaking them until they do. In the early days, we were content with two new mechanics and calling it a day, but nowadays, the mechanics are chosen for synergy, to make sure that combined efforts are worth more than the sum of their parts.
This is the section where, if you don't yet have it, you start creating cards that connect your themes. Part of making a good set is making sure that your file has the glue necessary to turn the set into a cohesive whole and not just an assembly of parts. I should note that, normally, you seed these synergies in when you create the mechanics, but with all the moving parts it's important to have time to check in and make sure the different elements of your set are working together.
It's also at this point that you have to start asking yourself what each color is up to. What is each color's theme? What is its mechanical identity? What is it doing that the other colors are not? If you want to be very advanced, you can also start asking what happens when certain colors get played together. In design, for example, we always look at the five monocolors and the ten two-color pairs and ask what happens if someone drafts them. Part of handing off the design file to development is having these answers.
As you can see, iteration in card design starts with the individual cards and then slowly works its way back until it encompasses the entire set. The trick is to start with a very narrowed focus and slowly work your way out until it encompasses the entire set.
Things to Keep an Eye On
As you iterate, there are a number of other things that you have to pay attention to:
Complexity:
As you try to fix problems, you will find that inertia will push you to add components. Your average word length will rise and your board states will grow more complex. The reason for this is that the fast answers involve adding things. Often, the best answers (and yes, the fast answers are seldom the best) will require removing things (or at least replacing things). As you iterate, you have to keep your eye on how complex your set is. This means that you have to carve out space for simple things and you have to have the tenacity to keep those simple things in the file.
Volume:
This issue is connected to the last. Most designers tend to add more than they subtract as they iterate. The reason is simple. They like what they have created, so when new problems arise, they solve it by creating new material. The thing that is crucial to remember is that when things come in, other things have to go out. New material has to come at the cost of old material. The act of creation, to slightly paraphrase Pablo Picasso, comes hand in hand with the act of destruction. If your set is in need of something new, that is most often a sign that something already in it needs to go.
Clarity:
One of the biggest problems of design is losing perspective. It's very easy to follow something every step along the way so that you don't realize how far you've drifted. This is why it's good to get outside perspectives or to have the luxury to put away your design for enough time that you can look at it with a fresh pair of eyes. Another good practice is to keep old design skeletons so you can look back and see the changes. As you compare old with new, ask yourself why each change was made and then ask if that need still holds true. Often, you will find that early answers worked better than you realized at the time.
Novelty:
One of the biggest problems with iteration is that you become more removed from the first impression of your set. Things that seem novel and new when you start eventually seem old and dated after you've played with them for a long time. Do not fall into the trap of seeing the newness of your set through your jaded eyes. Make sure to constantly expose new people to your designs so you can gauge its first impressions. An important part of the iterative process is making sure to hold onto the things that matter to your set even as your perspective changes.
Thoughtflare | Art by David Rapoza
One of the problems I realize with writing a series like this is that, as you get further into it, it becomes harder to walk through new designers on how it's going to play out. Everyone, for instance, will build their basic design skeletons similarly, but the iterative process will vary wildly. My goal with today's column is to try and give you some basics and enough general guidance to let each of you find your own way.
Last Words
My final advice is to enter every playtest open to listening to what the playtest will tell you, even if it isn't what you expect, and to enter every file pass willing to make the changes the set needs, even if that means cutting or changing things you love. Design, while a lot of fun, can also be disheartening at times. The trick is keeping your focus on what matters so you continue to improve your set with each iteration.
While I always like feedback, I am particularly interested in your thoughts on today's article and this series. You can send me an email through the link below, you can respond in the thread to this column, or you can respond through any of my social media (Twitter, Tumblr, and Instagram).
Join me next week when I meet my fate.
Until then, may your iteration be more fun than heartache.

